
Sewing a separating zipper in a doll hoodie, the easiest way!
12:41:00 PM

Sewing a zipper in a Doll Hoodie can be a bit of a daunting task because not only is everything small, the fabrics is stretchy aaaaaand it's a separating zipper!
This jacket is a part of the Wollyonline Pattern Baby Casual 2. You can find it after May 9th 2021 in the Wollyonline Digital Doll Pattern Shop
Below I will show you the easiest way that I have ever sewn a separating zipper in a doll hoodie. It may not be the most professional way, that would be with lining and all that good stuff, but it's quick and pretty much fail safe as long as you can stitch straight. Sometimes you just want to get the job done. And so here we go!

Make sure that you have 1/2" (1.2cm) extra allowance at center front to fold over to the inside. You may need to add that to the pattern yourself. Now get your hoodie ready to the point where the hood is sewn onto the body. And stick 1/4" wash-away sticky tape along the whole front edge, including the hood.

Pin the 1/2" (1.2cm) allowance, that you cut extra at center front, to the inside. Make sure the pins are not in the wash away tape. Remove the tape backing and press the allowance down.

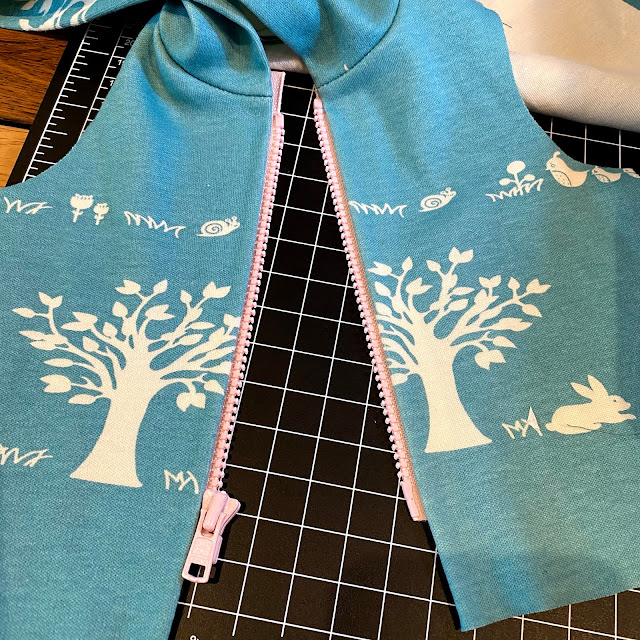
Stick the wash away tape along the zipper edge, start where the runner ends and go all the way to the zipper end.

Remove the paper backing from tape on one side and stick the zipper on the inside to the allowance. Make sure that the runner has plenty space to do its job.

Start the zipper about 1/4" (6mm) down from the hood/front seam. This is to avoid all that seam bulk that is sitting on the inside.

The inside will look like this.

Remove the sticky tape backing from the other side of the zipper and place that fabric front edge on the zipper too.
Open the zipper.

Fold the zipper top to the inside as shown here and pin. Do the same for the other side.

You now have a fully taped front edge with zipper in place and it's time to stitch it all down!

Start at one end with a nice long zigzag, not so much wide but certainly long, and stitch the allowance down all the way to the other end. Along the way you stitch the hood and catch the zipper with one side of the zigzag.

Turn your work so the right side is facing you.


You start at the hood/front seam and go down to the lower edge of the front. Repeat for the other side.

Your zipper is now secured and ready for work. You only need to finish your hoodie. This was quick, easy and it looks fabulous! Job well done!
Cheers & Happy Sewing!
Christel ❤️


0 comments